
It replaces the original communication cable "DTL-H3050".
Serial To USB Net Yaroze (V1)
(Obsolete - Old revision)

Serial To USB Net Yaroze (V2)
Available in Delta Store >>

1 - Prerequisites
- Playstation or Net Yaroze that has the ability to play CD-Rs (ModChip, Swap or Action Replay)
- CD "Net Yaroze boot disc" DTL-S3035 Cracked ![]()
- CD "Net Yaroze software development disc" DTL-S3045 ![]()
- "Serial to USB Net Yaroze" adaoter or playstation with STU Int
- An PlayStation Link cable ou china clone
if you have the original Net Yaroze boot CD + Net Yaroze + Access Card, you do not need the Cracked CD, no need to have a console that reads the CD-Rs either because you have the original
More download available for Net Yaroze in our section "Download: Net Yaroze and PlayStation"
2 - Connection
Connect your PS1 to your PC with the "Serial to USB Net Yaroze" as follows:

3 - PC Configuration
Dans un premier temps nous allons connecter le « Serial To Usb Net YarozeAt first we will connect the "Serial to USB Net Yaroze" to the PC via a USB cable. Windows will detect it and install the drivers automatically.
Once completed, we must go to identify the number of the Com port assigned by Windows. For that we will go in:
>>Start > control panel > Device Manager
We go down the list and there should be the "Serial to Usb Net Yaroze" visible as a COM port with in parentheses the port number assigned.
Note it, it will be useful for the next step.
Now we'll unzip the "Net Yaroze Yaroze software development disc" archive on your hard disc at the following location :
C:\net-yaroze-sdk\
We will now install "DosBox".
As a reminder this small utility allows us to launch Dos applications on our recent systems.
It has a very interesting function that allows us to return a real serial port in its emulated system. We install DoxBox.
To apply the DosBox patch, copy the "dosbox.exe" and "SDL.dll" files found in the "dosbox-0-74-5n1patch" archive into your DosBox installation folder, by default "C: / Program Files (X86) /DosBox-0.74/ ":
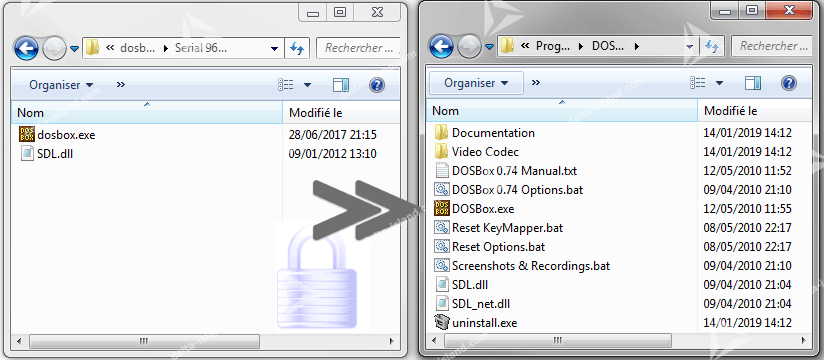
Then we will configure DosBox to map the "Serial to USB Net Yaroze" and give it its operating speed (9600 Bps at first).
We will go to the DosBox installation folder (default C: / Program Files (X86) /DosBox-0.74/) and we will run "DOSBOX 0.74 Options.bat:

Here we are in the presence of the DosBox configuration file opened with your favorite text editor.
Modify the "Serial" section as below and replace the "X" with the number of your previously recovered COM port:
[serial]
serial1=directserial realport:COMX
serial2=disabled
serial3=disabled
serial4=disabled

Then modify the "autoexec" section as below:
[autoexec]
# Lines in this section will be run at startup.
# You can put your MOUNT lines here.
mount c: c:\net-yaroze-sdk
c:\psx\djsetup.bat
c:

4 - Power ON
Insert the "Net Yaroze Boot Disc" CD (cracker if you do not have the access card in slot 1 of your PS1 / Net Yaroze).
Turn on your PS1 / Net Yaroze. You must have the following image on your screen:
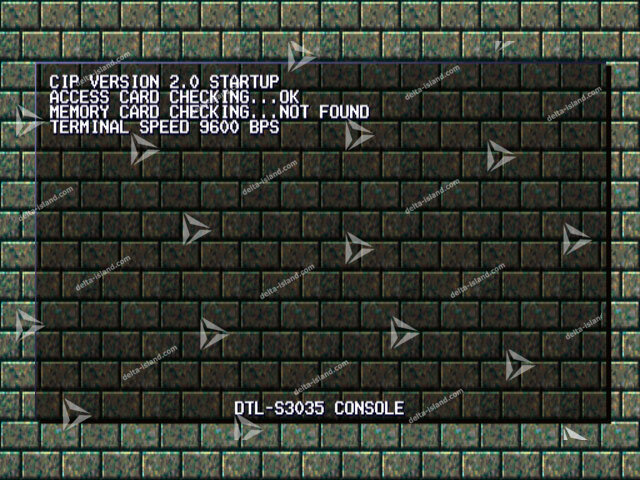
CIP Version 2.0 Startup
Access Card Checking...OK
Memory card Checking...Not found
Terminal Speed 9600 BPS
Access Card Checking...OK : Cracked CD, No need Access card.
Memory card Checking...Not found : the program of the "Net Yaroze CD boot disc" check if a memory card has been inserted in slot 2 and if a backup configuration is available inside them.
Le cas échéant, même avec une carte mémoire insérée nous avons le message « Memory card Checking...Not found ».
Terminal Speed 9600 BPS: see "chapter 6 : Communication speed" to increase the transmission speed.
Your PS1 / Net Yaroze is now ready to receive code via its serial I / O.
5 - Hello World
We move on to serious things, we will now execute code. To do this we will use the program "SIOCONS" translate «Serial Input Output CoNnectionS ».
Start DosBox and type the following commands:
C:
cd C:\PSX\QUICK\
siocons batch0
(the lines "c:" and "cd c:\psx\quick" have been added to "djsetup.bat" to boot directly into the "quick" folder)
If this is the first time you launch SIOCONS, it is very possible that the files are not compiled, you will then obtain this message :
Don't panic, let's compile it using the "make" command:
It can't find its temporary "tmp" folder, so we'll create it in the "net-yaroze-sdk" folder:
And run the “make” command again:
If you have access denied, you will have to go to the properties of the newly created "tmp" folder to make this modification:
You will can compile your files:
To finally relaunch the “siocons batch0” command:

You should have the screen of your Net Yaroze / PS1 which will have evolved to confirm the good reception and storage of the program, followed by the execution of the code:
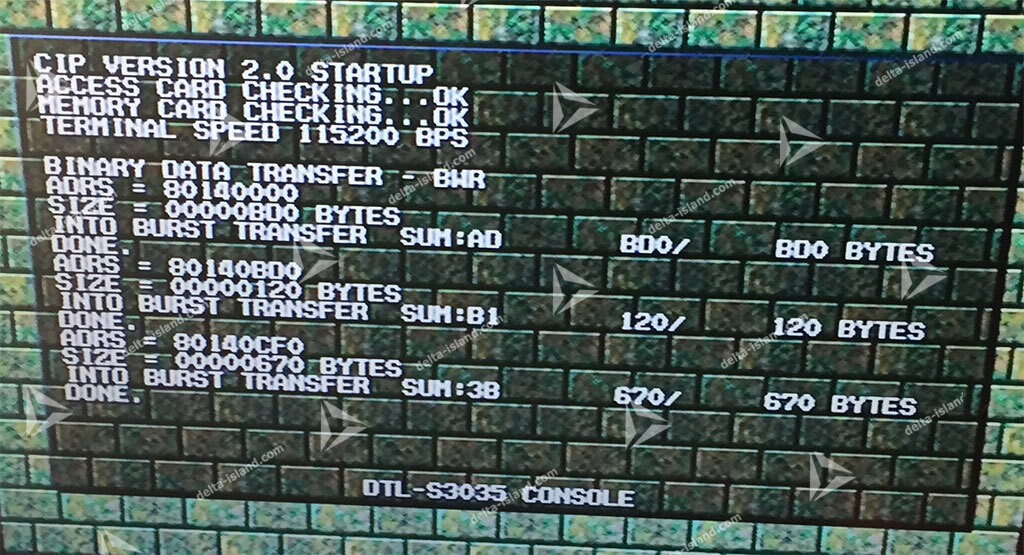
In folder C:\PSX\ on DosBox, you have several small test programs available, I let you discover them by navigating in your directories and executing the command "siocons auto"
6 - Communication speed
You are currently at a default speed of 9600bps, your Net Yaroze / PS1 has the capacity to mount at 115200bps and your "Serial to USB Net Yaroze" too!
We will increase the transmission speed to 115200bps.
Turn on your Net Yaroze / PS1 with the "Net Yaroze boot disc" CD and a memory card insert into slot 2.

It is normal for the message "Memory Card CHECKING...Not Found" appear.
Now run "DosBox" and type the following command:
siocons
Wait 2 sec and press the "Enter" key on your keyboard to regain control of the prompt "siocons".
Type the following command and validated by "Enter":
BAUD 115200
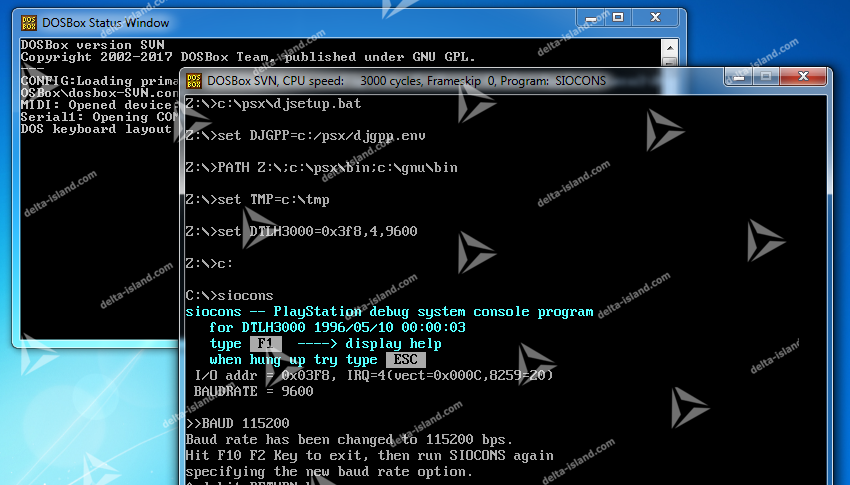

Your Net Yaroze or PlayStation is now at 115200 Bps, but your DosBox is still at 9600Bps.
Now press the "F10" and "F2" keys on your keyboard to recover the "DOS" prompt.
Now we will restart "Siocons" with an additional argument, for that type the following command:
siocons -B115200
After a few seconds, siocons asks you the following: "Save the new baud rate into the memory card ? ( y/n )"
Answer "y" with your keyboard.
"Siocons" will answer you "Completed".

"Siocons" has just confirmed the writing of the configutation speed to 115200 bps (Baud Rate) in the memory card slot 2 of your Net Yaroze or PlayStation.
Make a reset on your playstation. It now shows you the following screen:
CIP Version 2.0 Startup
Access Card Checking...OK
Memory card Checking...OK
Terminal Speed 115200 BPS

We still have to configure the transmission speed PC-side on DoxBox..
To do this, close dosbox and edit the file "DJSETUP.BAT" which must be here :
C:\net-yaroze-sdk\PSX\DJSETUP.BAT
In line 4, you must have:
set DTLH3000=0x3f8,4,9600
Replace 9600 by 115200, now you must have :
set DTLH3000=0x3f8,4,115200
Save and relaunch DosBox.
Your PlayStation and DosBox are now set to the maximum transmission rate of 115200 bps.
7 - STU Configuration
7.1 - Configuration STU V1
(For V2, got to 7.2 - Configuration STU V2)
You can reconfigure your STU Net to make it compatible with other applications or homebrew.
In first time, download FT_Prog ![]()
Proceed to FT_PRog installation and start it.
Connect your STU Net Yaroze.
In the top menu, do : "Devices" > "Scan and Parse" :

Your STU Net Yaroze will be recognized and will appear under "Device Tree" in the FT_Prog application:
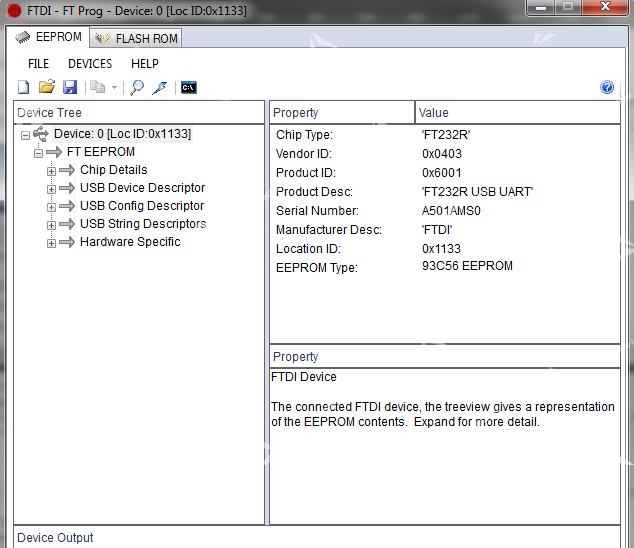
We will now modify the configuration of our STU.
For that we will go in the left panel:
"Device:X" > "Hardware Specific" > "Invert RS232 Signals"
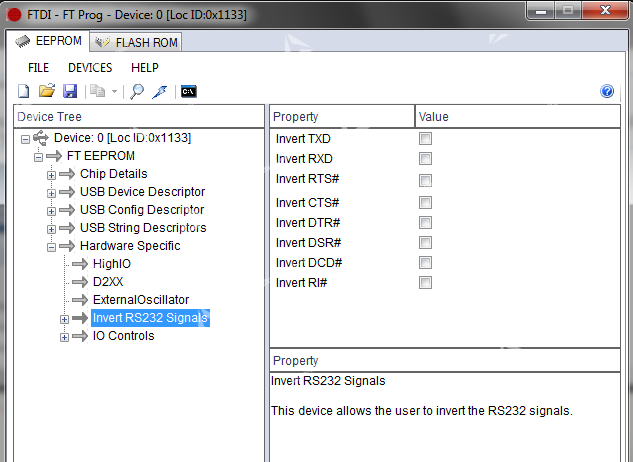
Here are the two possible configurations for your STU:
| Configuration 1 (Net Yaroze) | Configuration 2 (Homebrew) |
 |
 |
Now go to : :
"Device:X" > "USB String Descriptors"
In the right pane, uncheck "Auto generate serial" to keep the serial number :
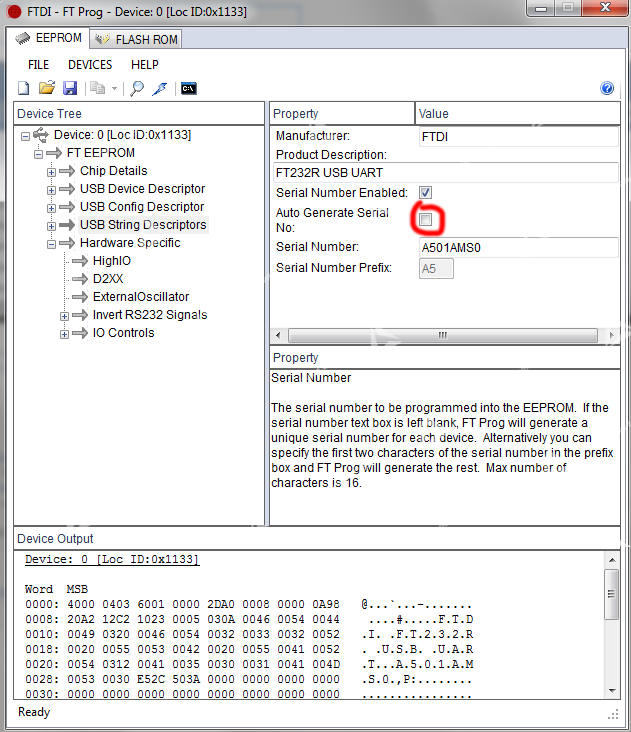
This step is important, if you reconfigure your STU by skipping this step, your STU will have a new Serial number and Windows will detect a new device and assign a new COM port.
The consequence of this and you will have to reconfigure your complete DoxBox or manually change the COM port number in the Windows Device Manager.
Now we will write the new configuration in the STU eeprom.
In the top menu, do:
"Devices" > "Program"

Then click on "Program" to program your STU. Once finished, unplug your STU from your PS1 and your PC and reconnect it. Enjoy !
7.2 - Configuration STU V2
You can reconfigure your STU Net Yaroze to make it compatible with other applications or homebrew.
With the STU V2, nothing could be easier. Simply flip the switch on your STU V2:
NY = NetYartoze - Configuration 1
HB = HomeBrew - Configuration 2
Information :
Although the button can be manipulated while powered on without risk, it is recommended to switch the console off and the USB cord unplugged.
This will avoid having errors when connecting via SIOCONS or your HomeBrew


